

")


Programming gizDuino UNO-SE with LabVIEW

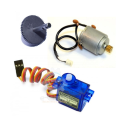
At present, electronics prototyping platform is used by millions of people around the world. Building amazing projects with sensors and physical materials to a microcontroller even without a bachelor’s degree in electronics.
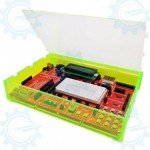
Having said that this generation thrives to continually explore and make things possible, it is right and just to brag about of “our own Philippine brand of Arduino UNO”, the gizDuino UNO-SE. Basically, gizDuino UNO-SE uses the same microcontroller core (ATMEGA328P) as the Arduino UNO, hence, there will be no code compatibility issue - if it runs with Arduino UNO, it will run on a gizDuino UNO-SE without any modification. It has the same I/O pin layout, ensuring compatibility will all Arduino UNO and gizDuino shields, and connects with the Arduino IDE by selecting Arduino UNO in the board selection menu.
Innovation entails the very concept of “convenience”. That is why it is in within this context that programming the said controllers ultimately requires a firm foundation of the C/C++ language. This is where NI LabVIEW comes into play.
LabVIEW or Laboratory Virtual Instrument Engineering Workbench is a system-design platform and development environment for a visual programming language from National Instruments.
National Instruments Corporation, or NI, is an American multinational company with international operation. Headquartered in Austin, Texas, it is a producer of automated test equipment and virtual instrumentation software. Common applications include data acquisition, instrument control and machine vision.
What makes Arduino-like MCU’s ideal for LabVIEW
According to Marco Schwartz and Oliver Manickum, “The Arduino community is extremely vast with thousands and even hundreds of thousands of projects that can be found using simple searches on Google. Integrating LabVIEW with Arduino makes prototyping even simpler using the GUI environment of LabVIEW with the Arduino platform.”
Why use LabVIEW?
“LabVIEW is a graphical programming language built for engineers and scientists. With over 20 years of development behind it, it is a mature development tool that makes automation a pleasure. The graphical system design takes out the complexity of learning C or C++, which is the native language of Arduino, and lets the user focus on getting the prototype complete.” (Schwartz, Manickum, 2015)
Download and Install LabVIEW 2017 for FREE!
Just follow the instructions provided by the link below:
https://www.youtube.com/watch?v=61-YT7XhBHA
Direct Links:
http://yoalizer.com/3FJA (Mega)
http://yabuilder.com/6Mmi (Mediafire)
After that, you will need the VIPM. A free software that interfaces nicely with LabVIEW and allows you to automatically install new packages for LabVIEW.
Download and Install VIMP!

You can download it from the following link:
http://jki.net/vipm/download
Once download and installation is done, the VIMP will now launch and it will look like this:

The VIPM will start downloading references to the package bundles into its repository. The status bar is located at the bottom of the application;

when the references are downloaded, the status bar will switch to Ready.

Finally, you will need to install the LINX package, which is a new package replacing the old LabVIEW Interface for Arduino (LIFA).
Download and Install LINX!
LINX provides easy to use LabVIEW VIs for interacting with common embedded platforms like Arduino, chipKIT and myRIO. Use the built in sensor VIs to start getting data to your PC in seconds or use the peripheral VIs to access your devices digital I/O, analog I/O, SPI, I2C, UART, PWM and more. (LIFA).
You can get it at the following URL:
http://sine.ni.com/nips/cds/view/p/lang/en/nid/212478
On this page, you will find a link to download the package


The VI package manager should open automatically and install the LINX package.

To know more about LINX: https://www.labviewmakerhub.com/doku.php?id=libraries:linx:start
Download and Install Arduino IDE
NOTE: You can use your Arduino IDE software, if you have it already.
1. You can obtain the Arduino IDE Version 1.8.5 by downloading the zip file from the official Arduino website by doing the following

1.1. Go to arduino.cc and go to the Software tab and select downloads.

1.2. Scroll down until you find the Download Arduino section then select the Windows ZIP for non-admin install.

1.3. You will be directed to the download page. Select just download.

1.4. Once downloaded, extract the ZIP file to the folder of your choice.
1.5 Your Arduino IDE is now ready for use.

CH340 DRIVER INSTALLATION
2. Now that you have the Arduino IDE its time to install the CH340 Driver. It is used by a number of Arduino compatible boards to provide USB connectivity
2.1. To install just go to e-gizmo.net and look for gizDuino UNO - SE.
2.2. Scroll down until you find the CH340 Driver Installer then clik download.
2.3. Run the CH340 DriverInstaller to install the prolific driver.
2.4. The CH340 Driver is now installed in your computer.
3. Afterwards open the Arduino IDE and connect the gizDuino LIN to the USB port.
4. On the IDE, go to the Tools tab and select board then choose Arduino/Genuine Uno.

5. Then on the Tools tab, select Port and choose the port where the gizDuino UNO - SE is connected to, in this case my board is connected to "COM5".

6. You can now start programming the gizDuino UNO - SE
Setting up LabVIEW and LINX
We will now set up LabVIEW and the LINX package so that all the projects of this book can work correctly. Perform the following steps:
1.First, start LabVIEW. Don't create any project, but click on Tools and then on Options.

2.You will be taken to the Options window of LabVIEW, where you can set all your preferences. Right now, we have to go to the VI server menu.

3.You can see that there are some options that you can change here. Change all the options so that they match the options shown in the preceding screenshot.
4.After that, we have to do the same on the VI Package Manager so that both LabVIEW and the Package Manager can talk to each other. On systems like Windows, it was automatically done, but it was not the case on OS X, for example. To do so, simply open the Package Manager, go to the Tools | Options menu, and then click on the LabVIEW icon.
5.In this menu, make sure that the Port value next to your LabVIEW installation is the same as the one you defined inside LabVIEW. Correct it here if it is not the case, and confirm.

Testing the installation
We are now ready to test our LabVIEW/LINX installation and start testing our LabVIEW interface for gizDuino UNO-SE. The first thing that you need to do is go to the main LabVIEW window; then, click on Tools and then on MakerHub, which is the link to access the LINX interface. Then, click on LINX, and finally, click on LINX Firmware Wizard.

This will take you to the LINX graphical interface that we will use to configure our gizDuino UNO-SE board for the project. Note that this step has to be done only one time; once the right software is loaded into the gizDuino UNO-SE board, you won't have to touch it again.
The wizard starts by asking us which board we are going to use. Configure this first page by selecting the same settings as shown in the following screenshot

Then change the settings by copying the set options provided on the screenshot below:

After that, you will be prompted to select the Serial Port on which you want the interface to communicate. As I only had one gizDuino UNO-SE board connected at that time, I could only select the port that Windows calls COM4. Of course, this will entirely depend on your operating system. A very simple way to find the COM or Serial Port that corresponds to your board is to look at the list of proposed Serial ports. Then, disconnect your board and see which Serial Port disappeared; this is the one that corresponds to your board
Finally, confirm your choice of Serial Port, and start uploading the firmware on the gizDuino UNO-SE

Congratulations! You are now ready to use the LINX interface to control your gizDuino UNO-SE board.
If you had an issue at this step, you might have to install the NI-VISA package, which you can download from this link: http://www.ni.com/download/ni-visa-4.3/988/en/

At the end of this setup, LINX will offer to open an example program. Accept this offer, and you will be taken to a new VI.

This is called the Front Panel of this example project from which you can control theproject. As you can see, this VI is really simple, as you can just control the value of a
digital pin of the Arduino by clicking on the green button on the right-hand side.
There are two things you need to modify here before you can start the VI. First, you
need to set the correct Serial Port in the Serial Port box. Just start by typing the name
of your port, and it will autocomplete what you are writing.
Then, you need to set which pin you want to control. I simply used pin number 13
here, as it is already connected to the on-board LED on the Arduino Uno board. If
you choose any other pin, you will be able to build a simple circuit on your board,
as shown in the illustration on the left-hand side of the preceding screenshot.
Let's now use the VI. To do so, simply click on the small arrow on the toolbar. Then,
wait for a while. Indeed, the VI will now try to initialize the communication with the
Arduino board. If you click on something immediately, it can produce an error. You
will know that the initialization process is complete when the Arduino board Serial
Port LEDs (TX & RX) are both turned on. Then, click on the green button; you will
see that the on-board LED on the Arduino board is immediately turning on or off.
Let's go a bit further and see what is behind that sketch. The details are beyond thescope of this chapter, but it can be interesting to see what is going on at this stage.
To do so, go to Window and then click on Show Block Diagram. Note that you can
also use the Ctrl + E shortcut to switch between Front Panel and Block Diagram.
This will open the following window:

This is the Block Diagram window for this project, which is basically what is going
on behind the scenes. Some of the components are linked to elements of Front Panel,
such as the Serial Port value. You can see that the core of the project is this Digital
Write module that we use to send commands to the Arduino board.
Reference: Programming Arduino with
LabVIEW by Marco Schwartz and Oliver Manickum
Documented by: King Johnnel Olgado