


NodeMCU with eHomeAutomation App Demo
24 Oct

Posted By
0 Comment(s)
13239 View(s)
Published: 2020-10-24 14:06:02
Demo Video
On this blog we'll share with you the eHomeAutomation apps works also with NodeMCU ESP8266 module and giving the updates on the display status of temperature and devices.Material used
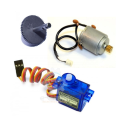
1 x NodeMCU ESP8266 with CH3401 x NodeMCU Backplane
1 x 4-Channel Automotive 12V Relay
1 x DHT11 Breakoutboard
1 x SSD1306 OLED Module(*one color)
1 x 12V Adaptor 2.67A (PB-1320-01C)
2 x 1pin jumper wire M-F 40cm
7 x 1pin jumper wire F-F 20cm
6 x 1pin jumper wire F-F 40cm
Its only P 1,156.25 (of all the items above)
Provide other materials such as
1 x USB Cable Type A - microB
1 x WLAN Router
Illustration Diagram

Instructions
Router- Set your router gateway to 192.168.0.1 port 80 and subnet 255.255.255.0.
Wiring Diagram
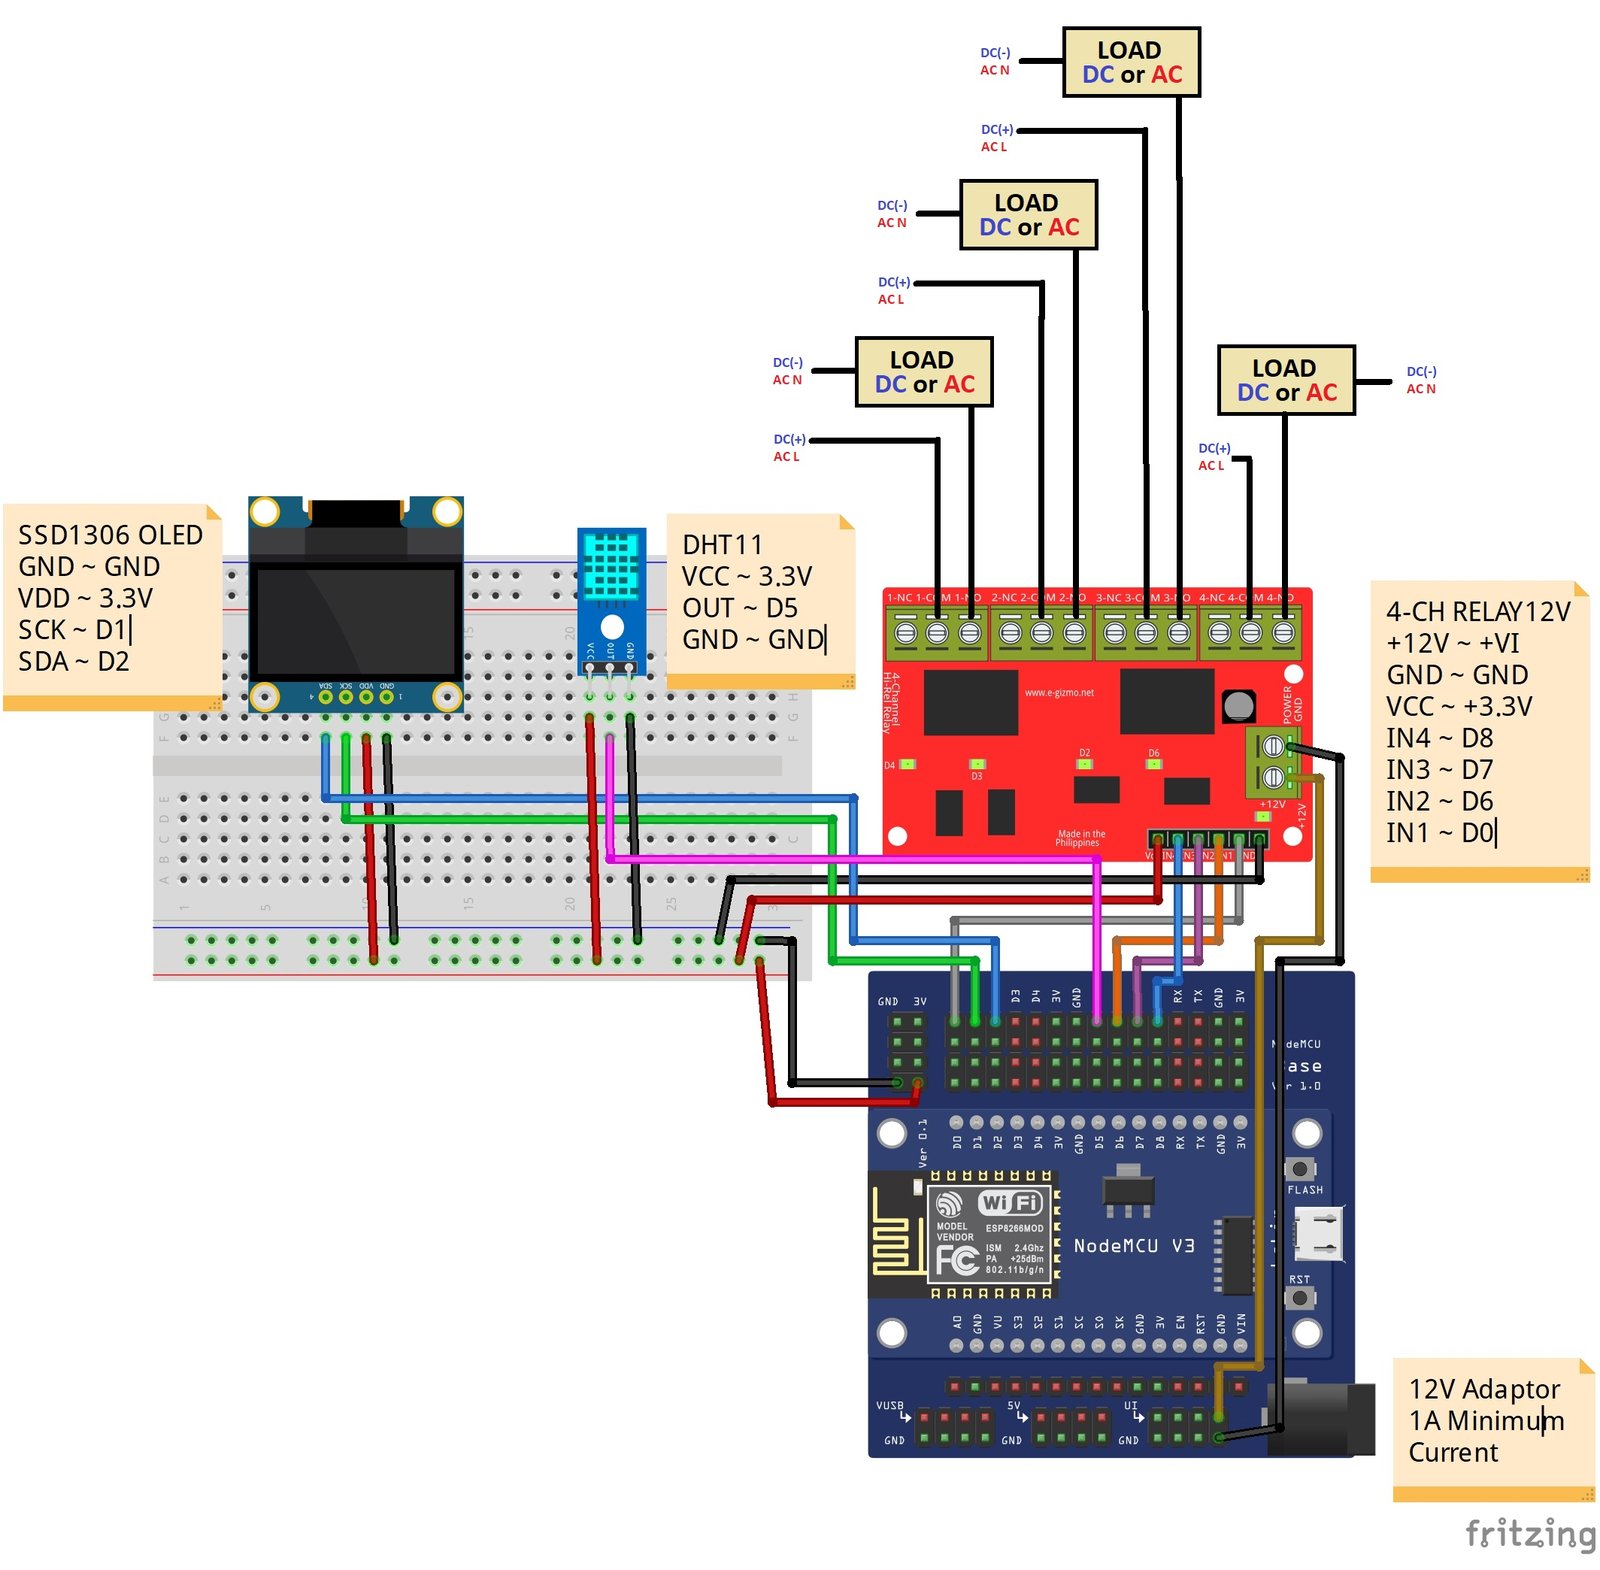
4-channel Relay 12V to NodeMCU ESP8266
See the Wirig DiagramNote: NodeMCU GPIOs output voltage is 3.3V so we need only use +3.3V for the power supply for SSD1306, DHT11, and on the VCC of the Relay.
For Power Supply:
12V Adaptor (PB-1320-01C)
CAUTION: HIGH VOLTAGE! DO THIS AT YOU OWN RISK. (Make Sure you follows the safety precaution - relay contacts has pins at the bottom, use anti-static mat or place it on a non-conductive surface)
Uploading the Arduino Sketch
1. Open Arduino IDE 1.8.13 or latest version.
2. Open the DeviceControl.ino from the HomeAutomation Library then modify some line of codes in SSID, PASSWORD sections
Visit the eGizmo github for HomeAutomation library, DHT and Adafruit_SSD1306 library. Click here
Note: Do not change the default IP address 192.168.0.200 because this will be the ip communication for home automation app on your mobile phone.
The code
About the app
Install the ehomeautomation app (apk download here)![]()
From your phone go to your Settings> Wifi settings> connect to your ssid and password.
Now OPEN the apps (Actually you do not need to type or anything the ip address, it just automatically connected)
Enjoy!
Here's behind the mobile application.
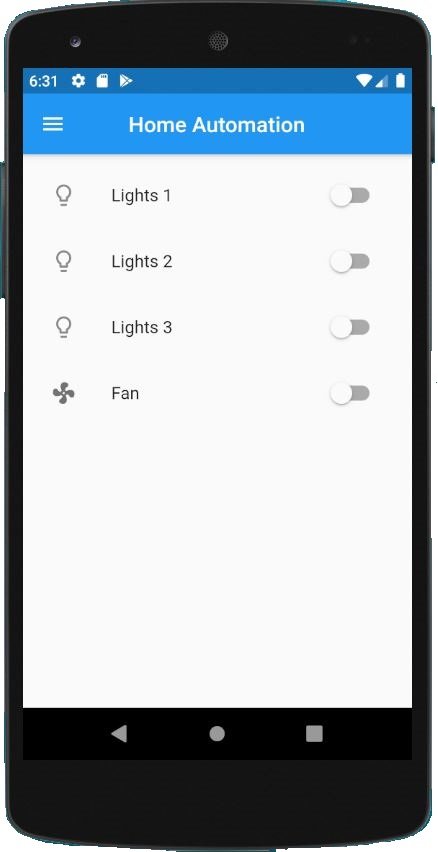
Click the 3 lines on the top left corner to visit our website and subscribe to our Youtube channel..

Stay tune on this blog post updates. BTW you can access the buttons on web page by typing the IP address on the URL, just make sure your laptop/computer is connected to your wireless or wired network.
Please leave a comment or suggestions for this blog. Thank you!
App reference: Flutter Applications
Leave a Comment