


")


PBOT2018 on ArduBlock – Controlling Servo Motors
04 Jul

Posted By
0 Comment(s)
2033 View(s)
Updated: 5/17/21
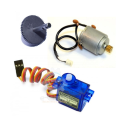
SERVO MOTORS SECTIONS:

P3 : SERVO 1
P4 : SERVO 2
P5 : SERVO 3
P6 : SERVO 4
PROPER UPLOADING:
Press and Hold the SYS RST (SW3) then switch ON the Power (SW1)
and Click Upload. Release SYS RST when done.
PBOT 2018 FUNCTION REVIEW:
- Set Servo number and position in degrees from 0 to 180.
- Servo Controls
PBOT.SERVO(whichservo,pulsewidth);
where:
whichservo = 1 to 4, ignore other values
pulsewidth = 0 to 180 (degrees)
           - value less than 500 stops the SERVO PWM generator
           - the pulsewidth converted to degrees from 0 to 180 (default)
Ex.: ![]()
GET STARTED:
- Setting Up your Arduino IDE with ArduBlocks and the eGizmo PBOT2018 Library. (Read Here)
- In ArduBlock, using PBOT 2018,
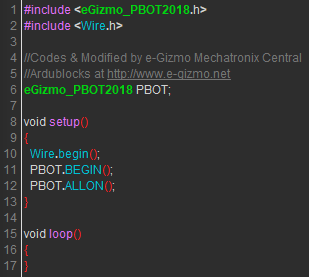
START WITH ADDING A BLOCK “PBOT BEGIN”

Adding PBOT BEGIN block – settting up the eGizmo_PBOT2018, Wire library and turn ON all the motors.
FOR SERVO BLOCKS

Double Click the block 1 to change the servo number also the 90 degrees to change it.

Upload to Arduino. This will shown on the IDE.
”YOU NEED TO FOLLOW THE EXTERNAL POWER SUPPLY FOR SERVO MOTORS.

Sample connection for Servo Supply you need another supply +6V for +V of servo channels.

Sample connection with 7.2v Ni-MH battery. Put a jumper for servo supply
- SERVO SWEEP.ino
 by
by